Showing posts with label US Army. Show all posts

Friday, 8 January 2016

I'll huff and I'll puff and I'll knock your house down

Catch up time. To kickstart my return to the blogging circuit I'll start by posting up some things I've done recently.

First up D9 bulldozer from SandSmodels in 20mm scale. It's not in the store yet. But I saw it on their Facebook page here. So when I placed an order for another item, asked Shaun about it and he kindly sent me out a model.
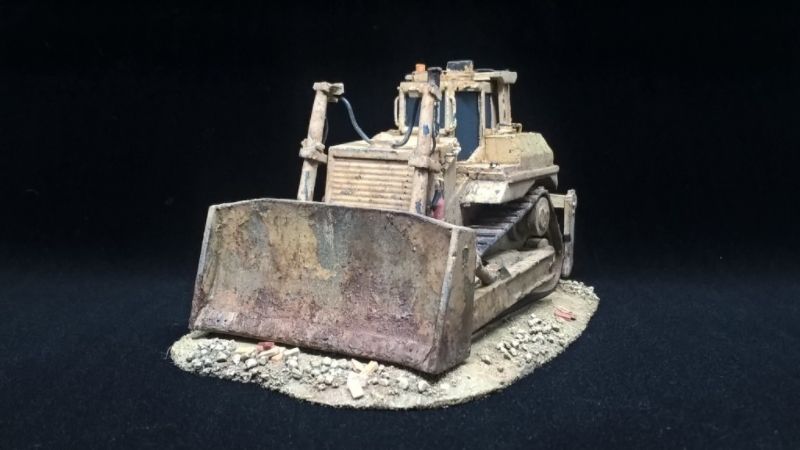

I've added cables for the hydraulics, grab handles, fire extinguishers, amber warning beacon and the aircon/heater unit for the cab. Built up some areas with plastic card. Added some card to the base of the blade to bulk it out more and around the cab deck. Then it was a case of weathering it....heavily.
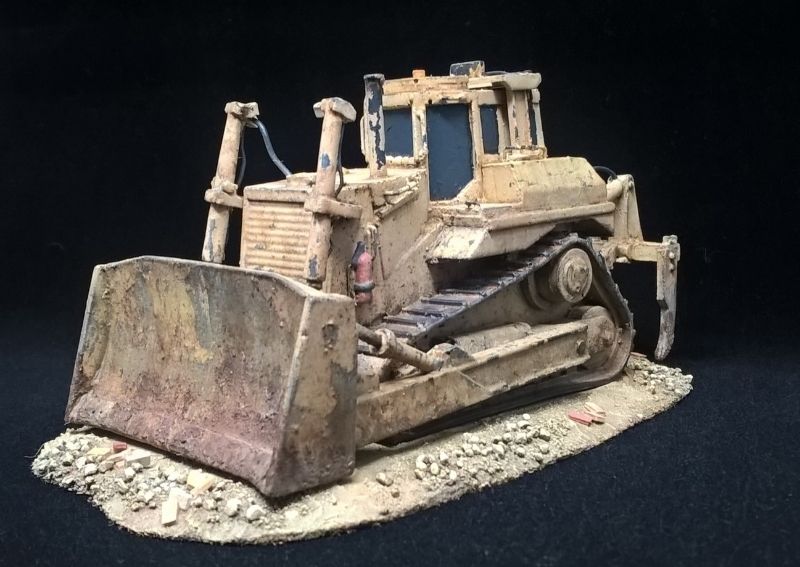
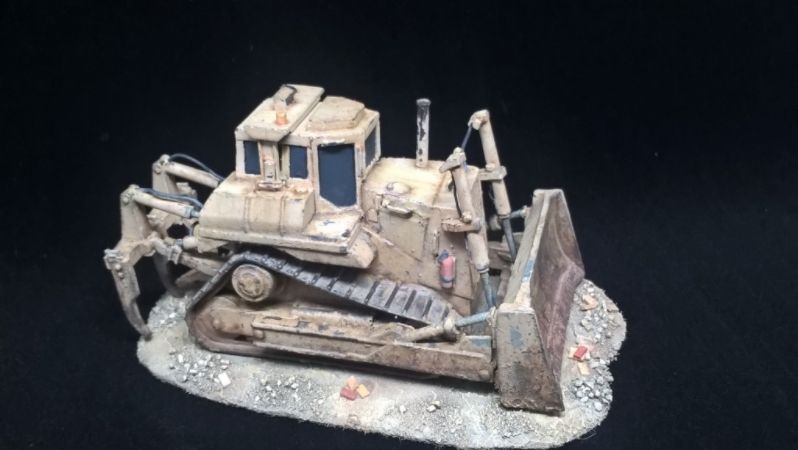
  

I've painted it to represent a vehicle used by US forces. I could not figure how to make the grill which sits over the blade or to add the headlamps which sit above the two blade arms. Fortunately I did find a photo on the net, of two US Army D9's parked side by side and one was missing the grill above the blade.


Overall I'm pleased with the result. Had a bit of a 'mare with the painting though. Decided to try out MIG Ammo Scratches fluid in place of my normal hairspray. I learnt to my cost that you can't leave the chipping fluid overnight to dry like hairspray. So I ended up having to reapply a base coat. This means if you look closely some of the detail is covered a little to heavy in paint. Live and learn! 

I didn't weather it heavy to hide these mistakes but to give it a real work horse look. Honest!:)

Anyway that's enough for now more to follow...


Tuesday, 6 May 2014

M1A1 (HA) Abrams MBT

Revell 1/72 scale M1A1 (HA) Abrams MBT.


This was the first 'true' plastic kit I've built in about 25+ years. Too many painful memories of dropping the tiniest pieces into the carpet never to be seen again or glue everywhere, not just on the model, had put me off for a long while. But since my re-interest in 20mm again I decided to take the plunge, and this was the first kit which I purchased and built.

The Revell Abrams has good reviews, from those who know about 1/72 scale plastic kits, for its accuracy. Took about a week to build and quite frankly I really enjoyed it. Then spent about another week painting and weathering the kit.


Learnt quite a bit from this first build. Main learning curve being take your time and the whole process will be more enjoyable. The tracks on this kit are link and length. Which means it comes in hard plastic sections and some actual individual pieces to go around the drive and idler wheels. I did think it would be a nightmare but with trial and some error, I actually prefer this method for representing tracks than the soft plastic versions so lovingly remembered from building Airfix kits as a boy...happy days!   


The stowage is mainly resin from CMK (Czech Master Kits). I'm not too sure if I've got the colours quite right on some of the stowage, so I intend to re-work some of it and maybe add some more. I drilled out the end of the gun barrel and drilled out the antenna 'attachments'(?). The antenna are plastic bristles cut from a floor handbrush.


It will be noticed I have not added any insignia. Partly because I do not like using decals and partly because I didn't believe it needed them. One item I would like to source are the Combat Identification Panels used on the Coalition vehicles. I believe the Revell M1A2 kit came with them but that kit is OOP at the moment.

The CIP can be seen on the rear of this M1A1.
The HA stands for Heavy Armour. No I didn't know that either until I had bought the kit and done some more research. The Heavy Armour in question is depleted uranium which increases protection but adds weight.


Overall a great kit, and I intend to build another one in the near future.

More too follow....